Dachser Road Freight (Europe): Account Configuration
For general information about how to configure a carrier in Carrier Connect, refer to our User Guide (German version).
To create a new Dachser Road Freight account in Carrier Connect, open Dachser Road Freight (Dachser Landverkehr Europa) in Master data > Carrier configurations. In the tab Accounts click on New.
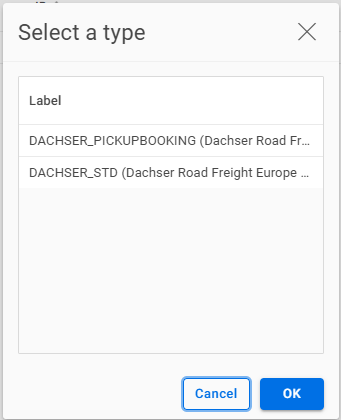
Select account type
- (1) DACHSER_PICKUPBOOKING only if you will use the value-added service Pickup Booking (PICKUPBOOKING).
- (2) DACHSER_STD in all other cases. It's the standard account type for outbound shipments.
If you want to create a new account, choose No:
Dachser account
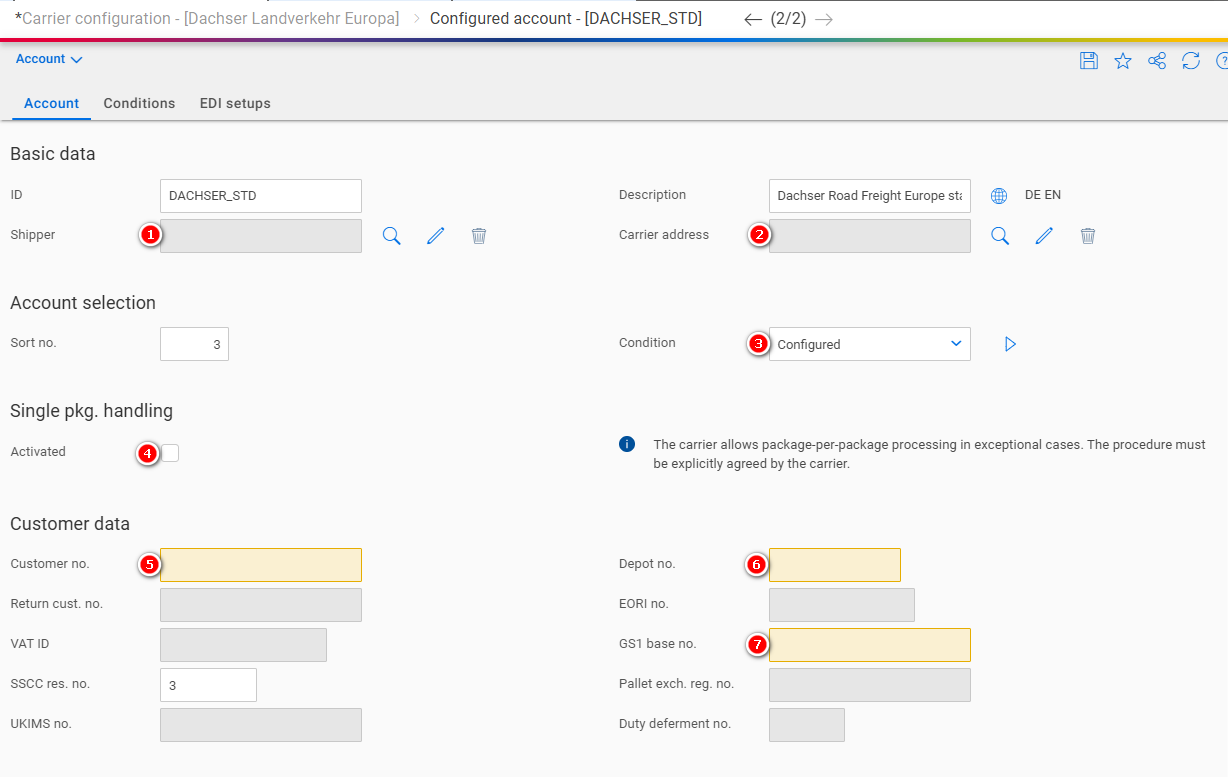
| Number | Field | Comment |
|---|---|---|
| 1 | Shipper | The address of the shipper |
| 2 | Carrier address | The address of the carrier (depot) |
| 3 | Condition | See our user guide |
| 4 | Single pkg. handling | See Single Package Handling |
| 5 | Customer number | Assigned by the carrier |
| 6 | Depot number | Assigned by the carrier |
| 7 | GS1 base no. | Your company's GS1 base number |
| 8 | Package no. range | See Package number range |
| 9 | EDI transmission | Set to Send and log |
| 10 | Document upload | If you want to transmit documents to Dachser electronically, set to Send and log |
| 11 | Doc. upl. connection | From the dropdown choose DOCUPLOAD |
| 12 | API key | Assigned by the carrier |
Single Package Handling

- The package number and the total number of packages are usually printed on the package label, e.g. 1 OF 2 for the first package, 2 OF 2 for the second package. Exception is the UPS service "Standard Package". With this service, 1 OF 1 is always printed on each package label, regardless of how many packages there are in total.
- If single package handling is activated, 1 OF , 2 OF , etc. will be printed on the label for all services except "UPS Standard Package".
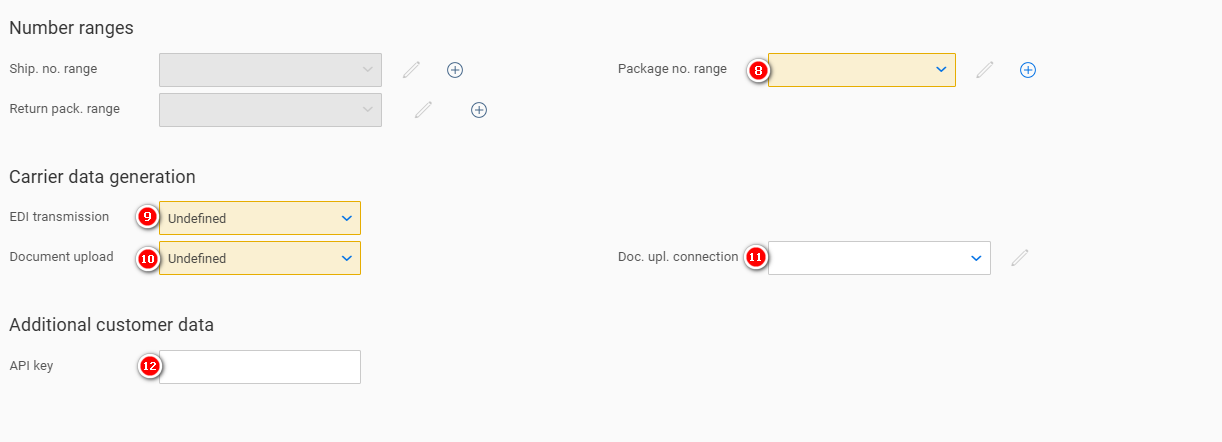
Package number range
For general information about how to configure number ranges refer to Entering new number ranges and receiving notifications (German version) in our Carrier Connect user guide.
Click on the + to create a new number range:
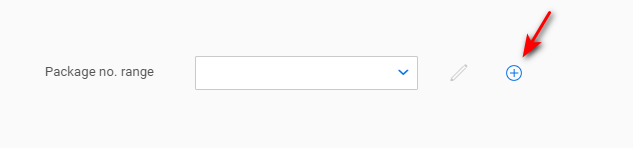

| Number | Field | Comment |
|---|---|---|
| 1 | Abbreviation | Choose a descriptive abbreviation. E.g. DACHSER_PCK |
| 2 | Name | Choose a descriptive name. E.g. DACHSER package number range |
| 3 | Start value | Assigned by the carrier |
| 4 | Max. value | Assigned by the carrier |
| 5 | Auto. re-start | Activated |
| 6 | Leading zeros | Activated |
| 7 | Char. length | Between 7 and 9, depending on the length of your GS1 base number (in total both numbers must equal 16) |
EDI setups
In this section the EDI upload parameters are configured. Dachser offers several different EDI types:
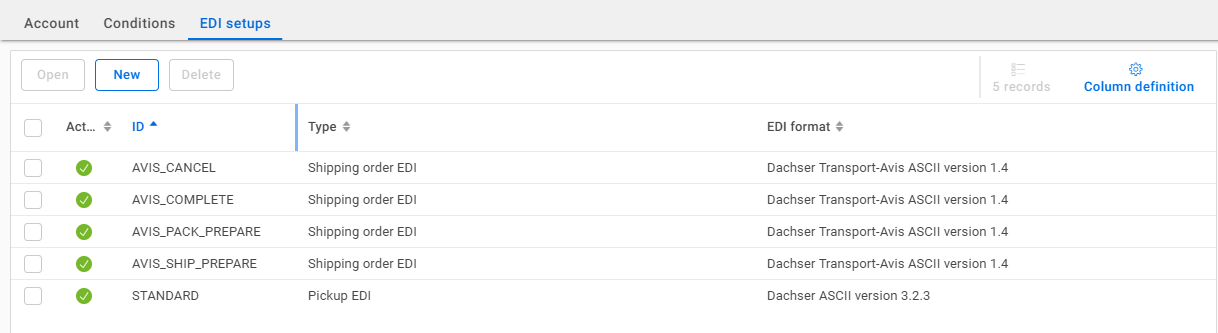
| ID | Comment |
|---|---|
| AVIS_CANCEL | Part of the AVIS EDI of Dachser. Triggered when the shipment is canceled. |
| AVIS_COMPLETE | Part of the AVIS EDI of Dachser. Triggered when the shipment is completed (doCompletion = true. For more details see doCompletion). |
| AVIS_PACK_PREPARE | Part of the AVIS EDI of Dachser. Triggered when a new package is created, i.e. the shipment is updated (only relevant when using single package handling). |
| AVIS_SHIP_PREPARE | Part of the AVIS EDI of Dachser. Triggered when the shipment is created. |
| STANDARD | This is the EDI of the manifest. Triggered when the pickup containing the shipment is closed. |
Select the EDI ID you want to configure and click on Open.
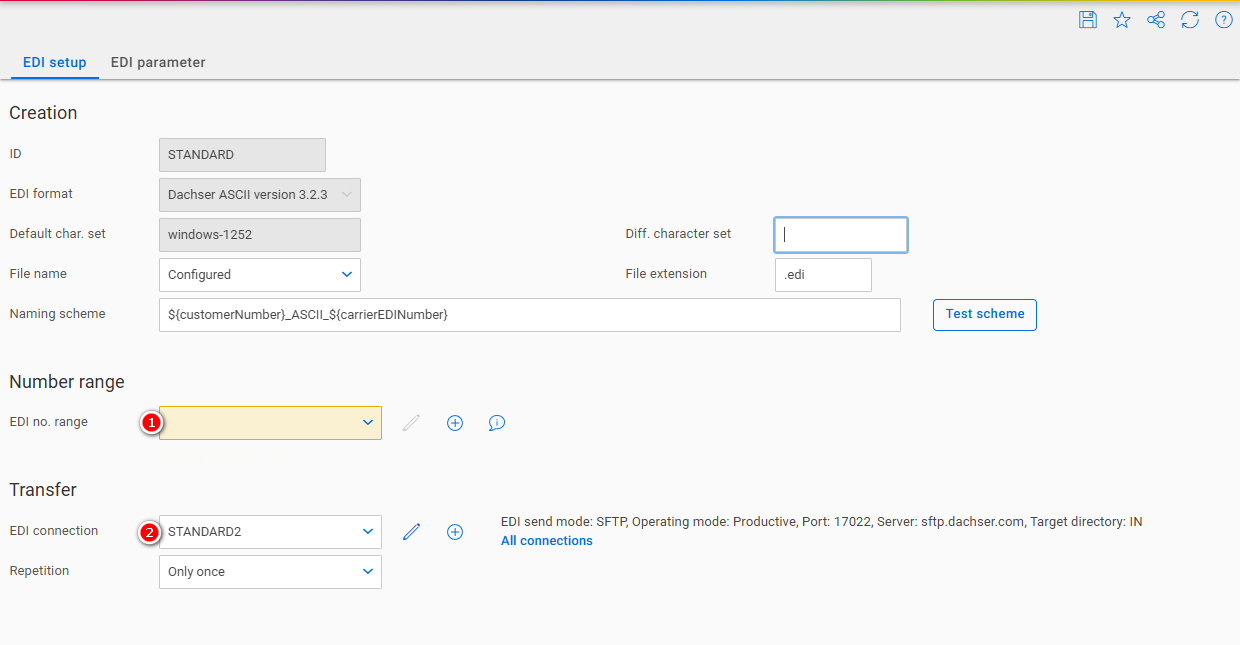
| Number | Field | Comment |
|---|---|---|
| 1 | EDI no. range | The EDI number range. See EDI number range |
| 2 | EDI connection | The SFTP-Parameters used for the EDI upload. See EDI connection |
EDI number range
For general information about how to configure number ranges refer to Entering new number ranges and receiving notifications (German version) in our Carrier Connect user guide.
Click on the + to create a new number range:

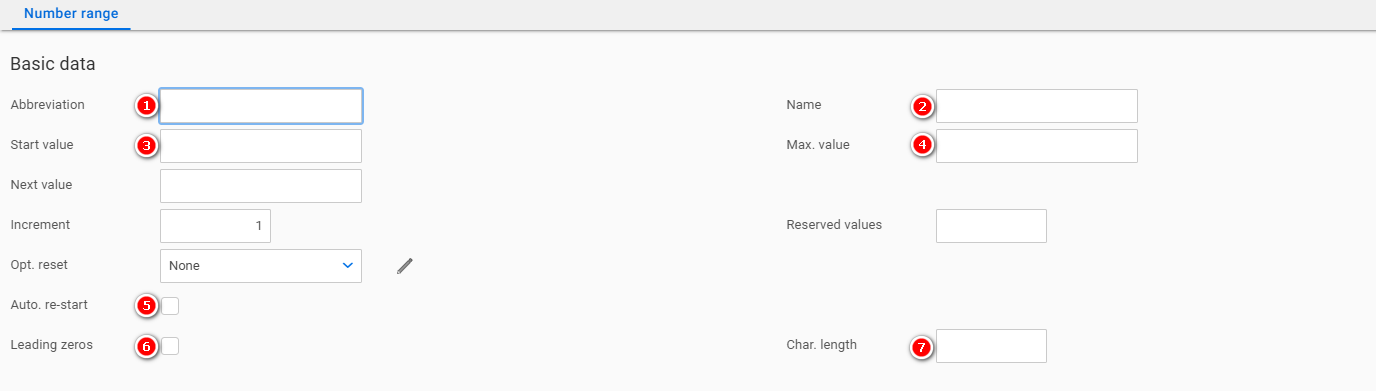
| Number | Field | Comment |
|---|---|---|
| 1 | Abbreviation | Choose a descriptive abbreviation. E.g. DACHSER_EDI |
| 2 | Name | Choose a descriptive name. E.g. Dachser EDI number range |
| 3 | Start value | 1 |
| 4 | Max. value | 99.999 |
| 5 | Auto. re-start | Activated |
| 6 | Leading zeros | Activated |
| 7 | Char. length | 5 |
EDI Connection

| Number | Field | Desciption |
|---|---|---|
| 1 | Operating mode | You can configure both test and productive parameters. This depends on your carriers setup (does he offer a test EDI-upload?) |
| 2 | Server | Assigned by the carrier |
| 3 | Port | Assigned by the carrier |
| 4 | Target directory | Assigned by the carrier |
| 5 | User | Assigned by the carrier |
| 6 | Password | Assigned by the carrier |
| 7 | Check SFTP parameters | After you set up your credentials you can test the connection |

Updated 7 months ago